For the longest time I’ve run my own Pihole DNS server, with it’s upstream DNS resolvers set to the two OpenDNS anycast IP addresses. I do this because it gives me visibility into my networks DNS and takes the logs away from my ISP and any organizations that have access to their data.
However, once DNS is resolved and my devices are sent to their destination, it’s seen by the ISP. Most traffic is encrypted using SSL, so the content may not be readable, but the meta-data is. My ISP and any organization they may partner with has visibility into all the unique destinations their customers visit.
I’m a trusting person that does choose to believe that my ISP likely isn’t spying on me. I also don’t do illegal things, so am doubtful there’s a subpoena out for my specific data, but just the fact that my traffic destinations and patterns are visible and could even be subpoena’d bugs me. I don’t need to make it easy to get my information and should be doing whatever possible to further obfuscate and hide my network activities.
That brings me to this idea:
I want to send my home network traffic through a VPN. This will encrypt everything sent through a VPN tunnel, making it so my ISP is unable to see what I’m doing. Only the VPN company can see it. It’s one more step toward making tracking my behavior difficult or impossible.
I thought about doing this to my entire home network, but the exit points of the VPN service I use (Private Internet Access/PIA) tend to be blocked by Google, Netflix, and other services for suspicious behavior. So instead of this being and easy situation where I just put a system in between my network and the internet that is connected to PIA, I need two networks:
- Regular home network for family, guests, apple TV, smart speakers, etc…
- VPN network for anything I want to send through the encrypted tunnel.
I wanted this setup to be easy to use once it’s configured and decided to go the route of having two wireless networks. Once I decided, I had it running in maybe 20 minutes. It would have taken a lot longer as I was initially planning on building a PFSense Virtual machine that would send traffic for a wireless network through another system that ran openVPN to PIA, but then I remembered that I have a fancy little travel router that can do all this for me!
Here’s all the info that made it possible:
My network
My network is all Unifi and looks like this:
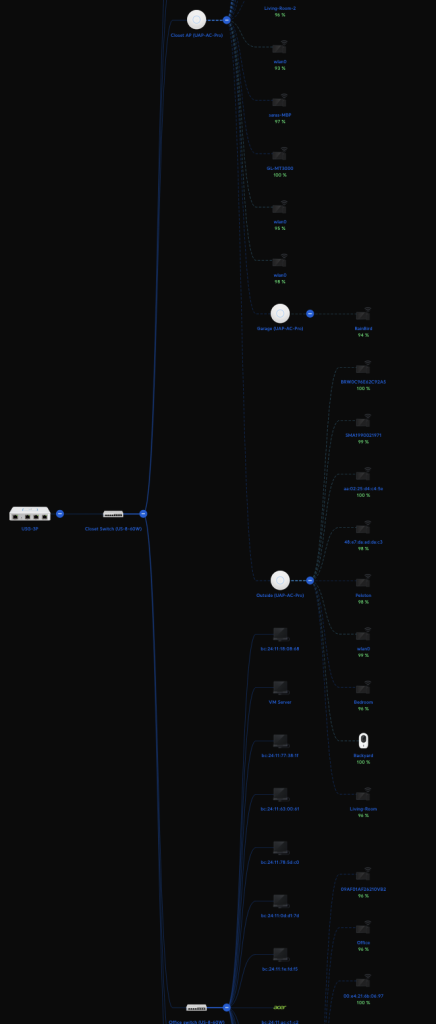
While hard to read from this zoomed out view, it’s actually fairly simple. I have a gateway device, then a system that manages all the other devices (it’s what gave me this topology view and allows me to change settings). The other devices are four access points, two switches, and a LOT of systems. Some of those systems are computers, many are VMs, others are phones, speakers, lights, sprinkler systems, and more. If you want to get on the network, you just join my wireless network like you would anywhere else.
UniFi makes it easy to make additional networks. You just have to go to Settings > Network > New Virtual Network.
I created a network called ‘piavlan‘:
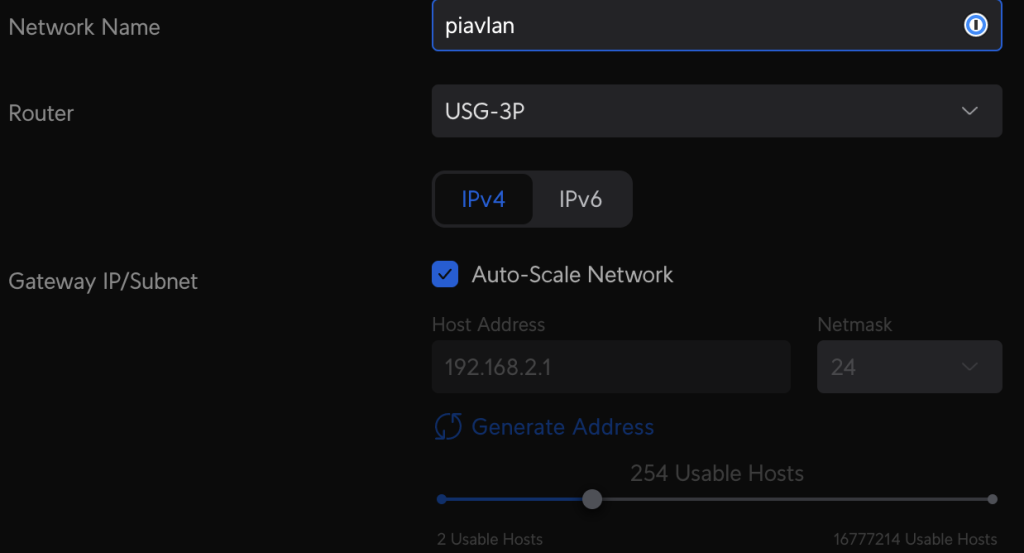
I leave it at IPv4, keep Auto-Scale Network checked, and accept all the other defaults except for the following:
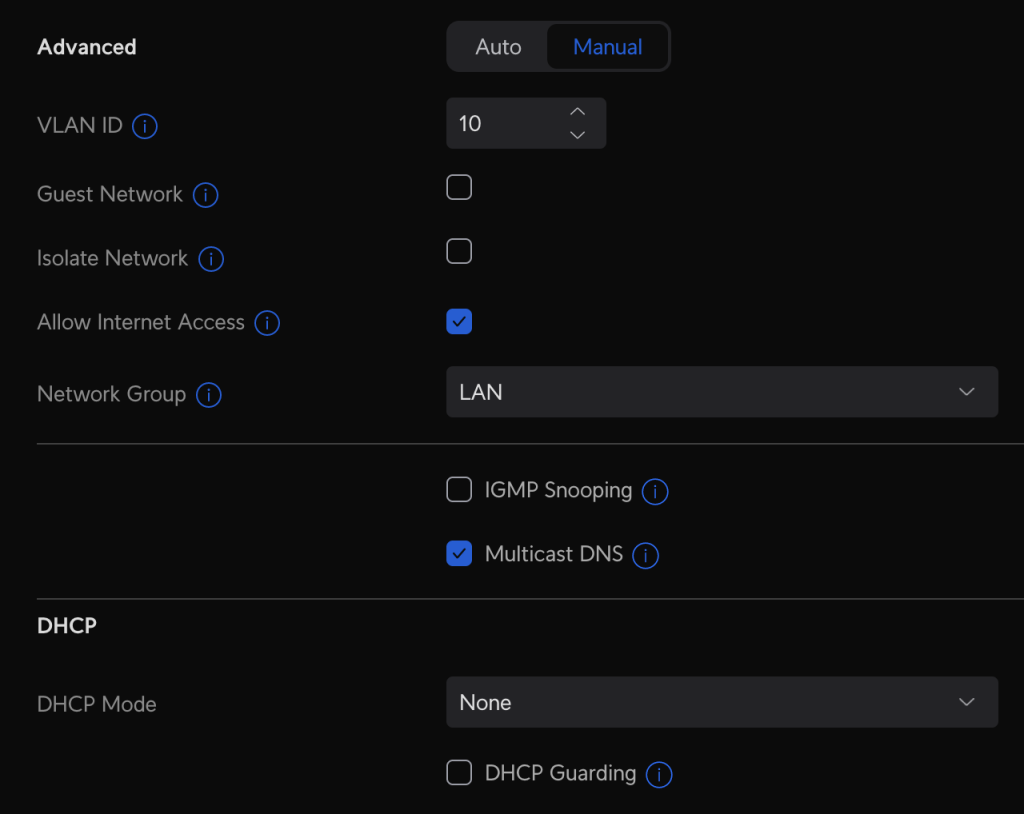
1: The VLAN ID gets set to 10
2: I disable DHCP mode (set to None). The device that connects to PIA will handle DHCP for clients.
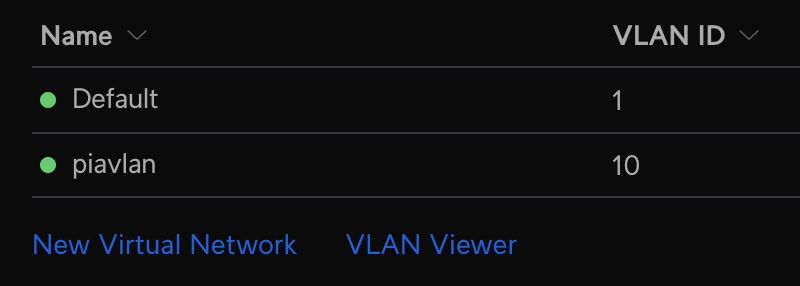
Once finished, my networks page looks like this:
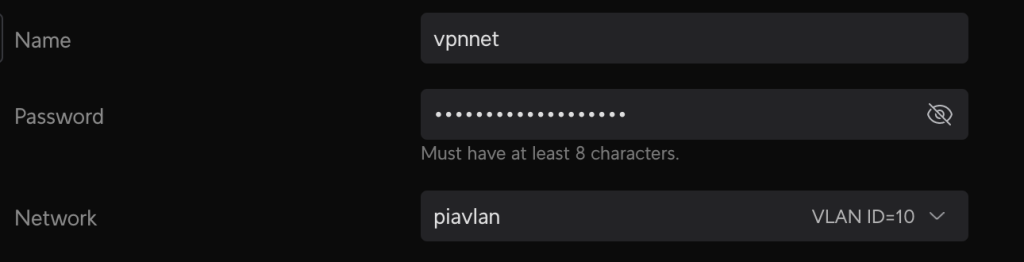
Next, I went into settings > wifi > create new. For the settings, everything is at default except for the following:
1: Name. This is the SSID that will broadcast for your clients to connect to.
2: Password: The password to join the wireless network.
3: Network. Choose the VLan (piavlan)
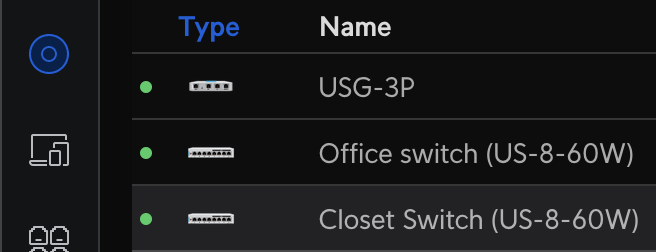
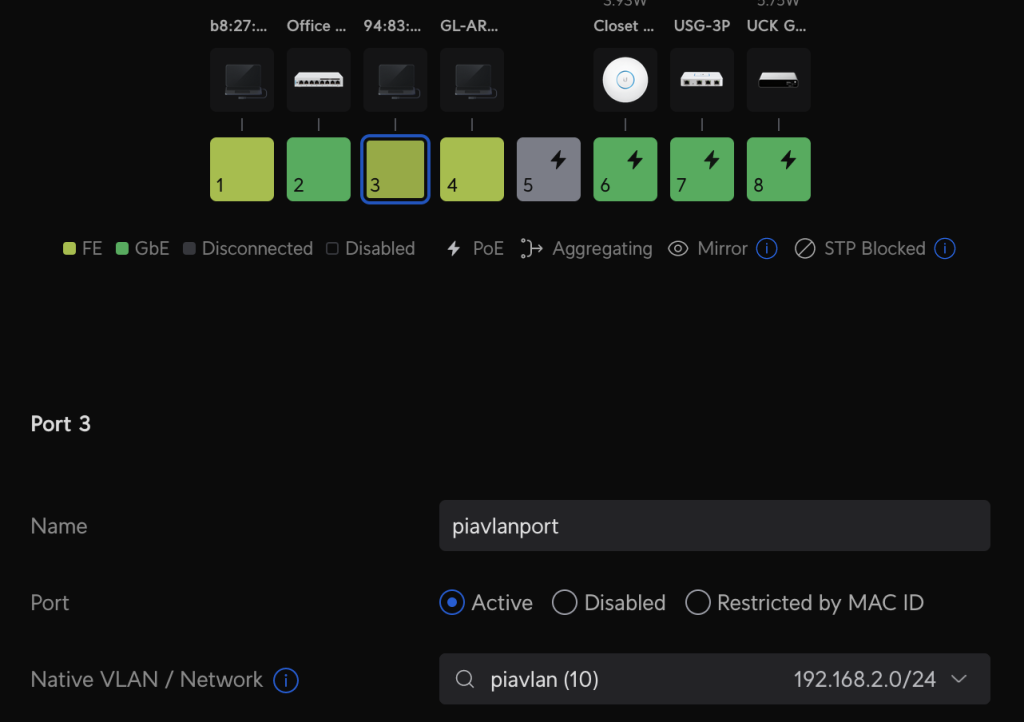
Once done, I then need to configure a port on one of the UniFi switches by going to ‘Unifi Devices > the switch I’m interested in. In this case, it’s the one labeled ‘Closet Switch (US-8-60W):
When clicked, the following window appears:
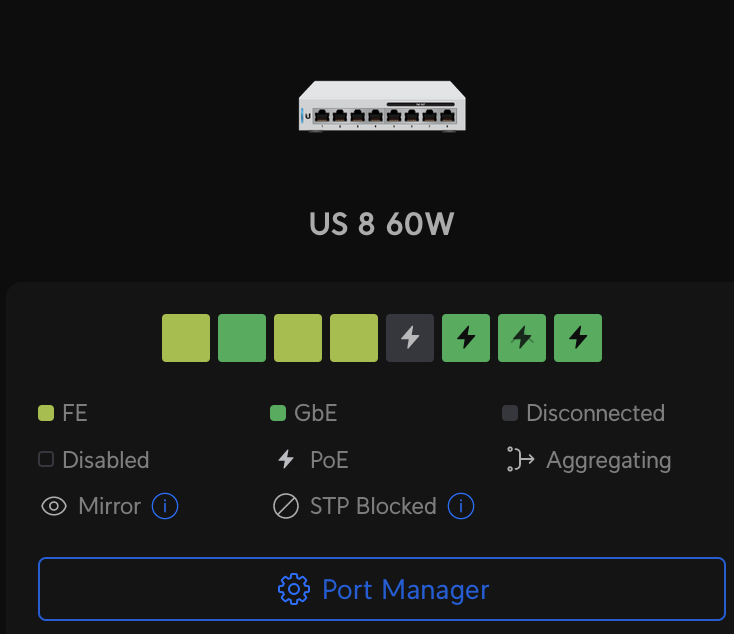
Clicking on Port Manager brings up the following:
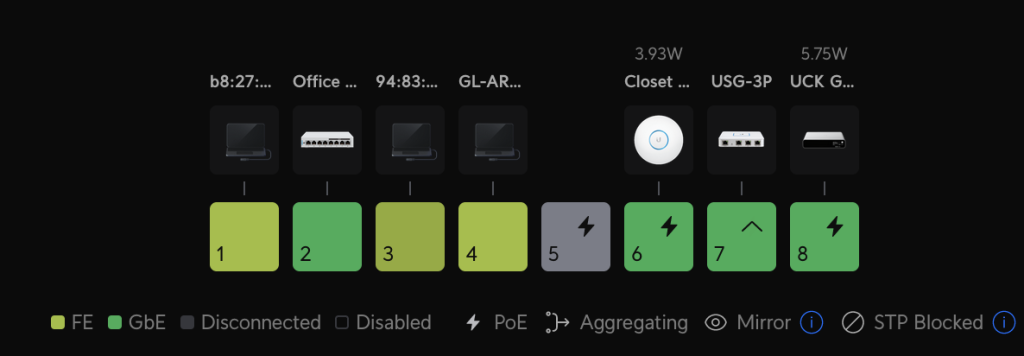
Now, you can just click the rectangle of the switch port to configure and set it to the correct network. I chose switch port 3.
Now that the network is configured, it’s time to set up the router that will take care of the PIA connection.
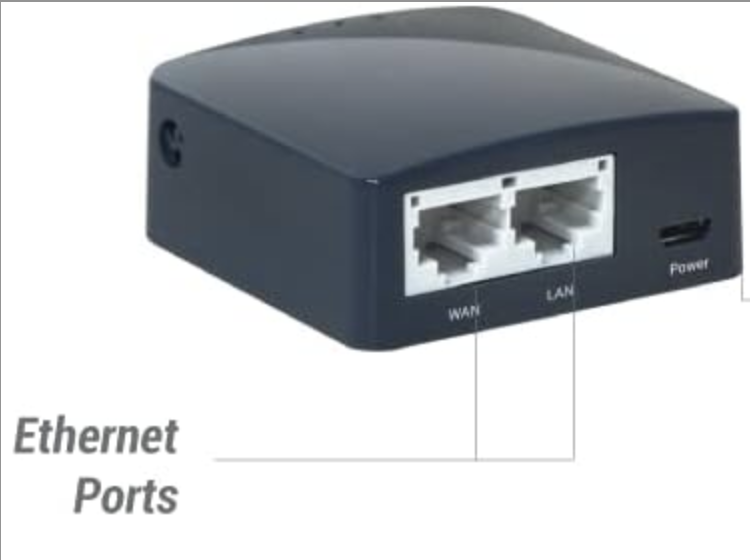
The device I’m using is by a company called GL-iNet (not an affiliate link). They make this tiny (palm sized) router that runs OpenWRT. They’re amazing devices. It has a switch on the side that can be configured to automatically connect to OpenVPN or Wireguard when switched on. It’s meant to be used as a router when traveling, hiding all your devices while at a hotel or wherever.

It is a wifi access point, but also has a LAN and WAN port. The WAN port goes to your ISP modem or other upstream router and the LAN port is for your laptop/desktop, or a switch. The way I’m configuring it for this application is to disable the wireless and to only use the WAN and LAN ports.
First, I’ll explain the configuration, then how it’s plugged it into the UniFi network.
Configuration:
- Download the PIA OpenVPN profiles from https://www.privateinternetaccess.com/openvpn/openvpn.zip. You don’t need to unzip the file. Just save it for now.
- One you have the router powered on, connect to it via its wifi or the LAN cable and get into the web interface as described by its instructions.
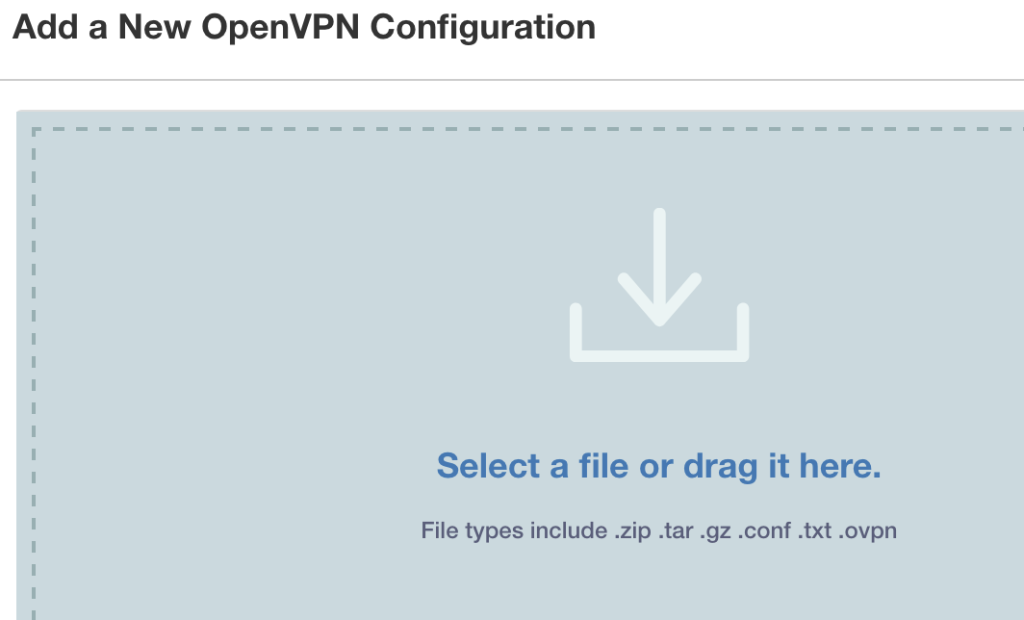
- In the web interface, click on ‘VPN’ > ‘OpenVPN’, then click the following button:

4. Add the openvpn.zip to the following window and click ‘Submit‘
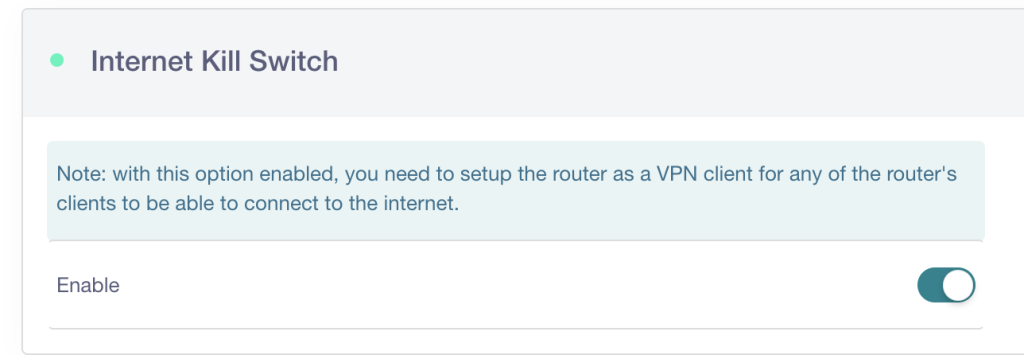
You can also enable the Internet Kill Switch in the web interface as an extra precaution to disable internet if the VPN disconnects:
Now it’s time to plug it into the UniFI network!
I took the router to my switch. Remember, in my case port number 3 is the VLAN.
I plugged the LAN port into port 3 on my UnFi switch. Then I plugged the WAN port into another available port. The WAN port will allow this router to be treated like any client on my network, assigning an IP via DHCP. The ‘vpnnet‘ wireless network will send its clients through the ‘piavlan‘ to port 3 of the switch, which goes to the LAN port on this router. That traffic then gets encrypted into a PIA tunnel and sent out as encrypted traffic through the WAN port and out to the internet.
Don’t forget to actually start the OpenVPN connection. In the web interface, go to VPN > OpenVPN, and click ‘Connect’. Once the connection is started, it’s ready to go.
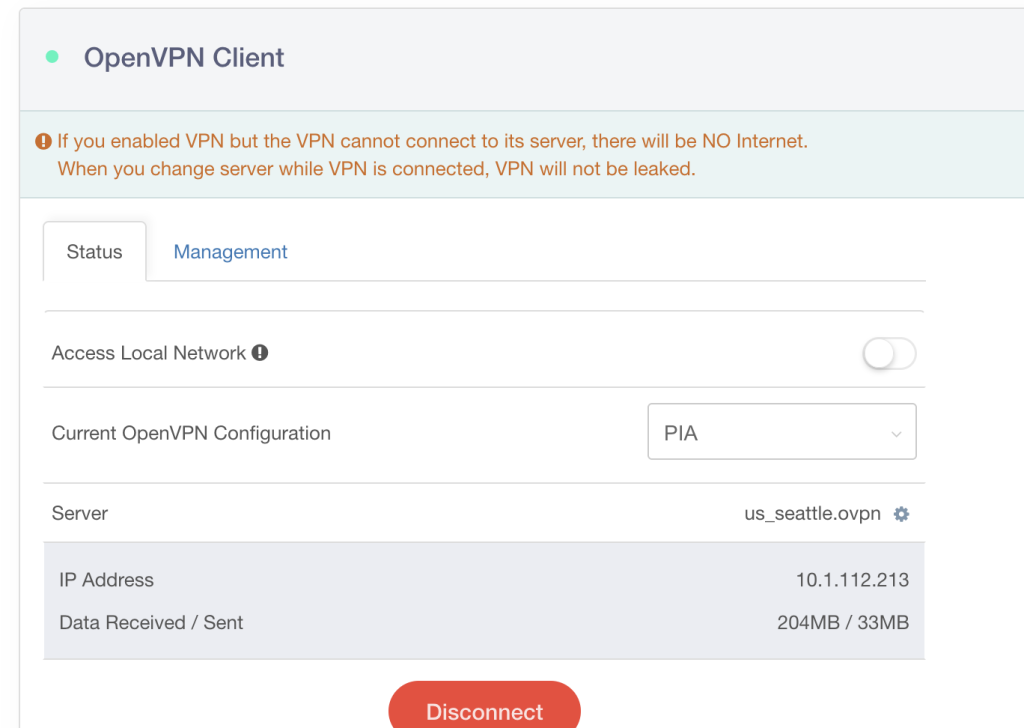
One note, make sure to select the Server that is closest to you or it will default to something else that might be slower. You can see in the following screenshot that my server choice is us_seattle.ovpn. To change that to another server, click the gear and select a different option.
Just to show it working as best as possible, here are some additional screenshots:
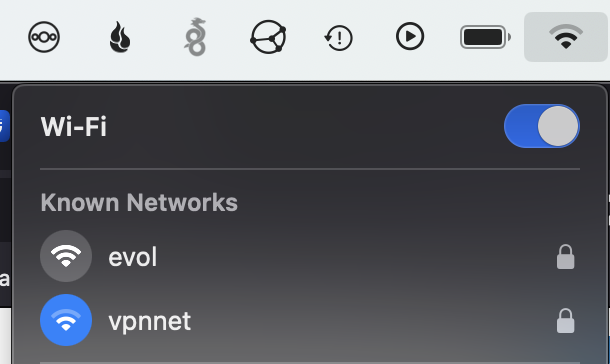
Here, I’m connected to ‘vpnnet‘ (‘evol‘ is my regular network).
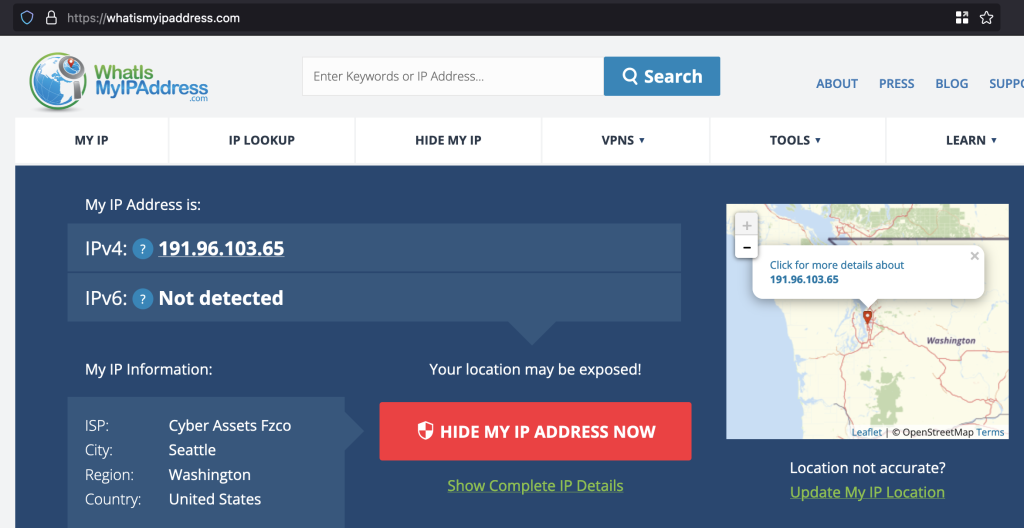
When I then go to https://whatismyipaddress.com, it shows me coming from the PIA endpoint:
This setup is really easy to work with. I can keep my phone, ipad, and other devices that have a lot of information about my habits on this network, while keeping an apple TV, my work laptop, and some other systems on my ‘clear’ network.